 Pin It
 Transform ordinary pies into showstoppers with this gorgeous fishtail braid crust technique. The intricate woven design creates bakery-worthy presentation that will impress everyone at your table. Perfect for holiday gatherings, special occasions, or whenever you want to elevate your baking game.
The process involves creating twelve dough strips, grouping them into sets of four, and weaving them using a simple four-strand fishtail pattern. While it looks impressively complex, the technique is straightforward to master. The result is a beautifully detailed crust edge that adds professional polish to fruit pies, custard tarts, quiches, or savory pot pies.
Blind baking ensures the crust stays crisp and golden, preventing soggy bottoms regardless of your filling choice. The recipe yields one 9-inch crust with braided edges that bake to perfectly flaky, buttery perfection. Brush with egg wash for that irresistible golden shine that signals homemade excellence.
The first time I attempted a fishtail braid crust, my kitchen looked like a flour bomb had gone off. I had been scrolling through social media at 2 AM, saw those intricate woven edges, and thought surely I could master that before my book club arrived the next evening. Three failed attempts later, I was sitting on the floor surrounded by dough strips, laughing at my own hubris, when my roommate walked in, took one look at the chaos, and asked if I needed help braiding my hair instead.
My sister got married last autumn and somehow I volunteered to make all the desserts for the reception. I spent three solid days practicing this braid technique, my hands cramping and my apron dusted with enough flour to seed a small garden. When the wedding guests gathered around the dessert table, someone actually asked which bakery I had ordered from, and that moment of secret pride was worth every frustrated dough strip I had scrapped along the way.
Ingredients
- All purpose flour: Cold flour prevents the butter from warming up too quickly, which is essential for those flaky layers that make pie crust so magical
- Cold unsalted butter: I keep mine in the freezer for 15 minutes before starting, and cutting it into cubes while still cold makes it easier to work into the flour
- Salt and sugar: The salt enhances the butter flavor while just a tablespoon of sugar helps the crust brown beautifully without making it sweet
- Ice water: Absolutely crucial, and I mean actually ice cold, not just kind of cool from the tap
- Egg and milk for wash: This creates that gorgeous golden finish that makes people think you are a pastry professional
Instructions
- Mix your dry ingredients together:
- Whisk the flour, salt, and sugar in a large bowl until they are completely combined, which takes about thirty seconds but makes a real difference in the final texture.
- Cut in the cold butter:
- Work those butter cubes into the flour with a pastry cutter or your fingertips until the mixture looks like coarse crumbs with some pea sized pieces still visible, because those bits create the flaky layers we all love.
- Add ice water gradually:
- Pour in six tablespoons first, mixing gently with a spatula, then add more only if the dough is not coming together when you squeeze a handful.
- Form and chill the dough:
- Divide the dough in half, form each piece into a disc, wrap tightly, and refrigerate for at least one hour because this relaxes the gluten and makes rolling so much easier.
- Prepare your pie base:
- Roll out one disc on a floured surface, carefully press it into your nine inch pie plate, trim the edges, and return it to the refrigerator while you work on the braiding strips.
- Create the braid strips:
- Roll the second disc to about a quarter inch thickness and cut twelve long strips, each about half an inch wide, using a sharp knife or pastry wheel for clean edges.
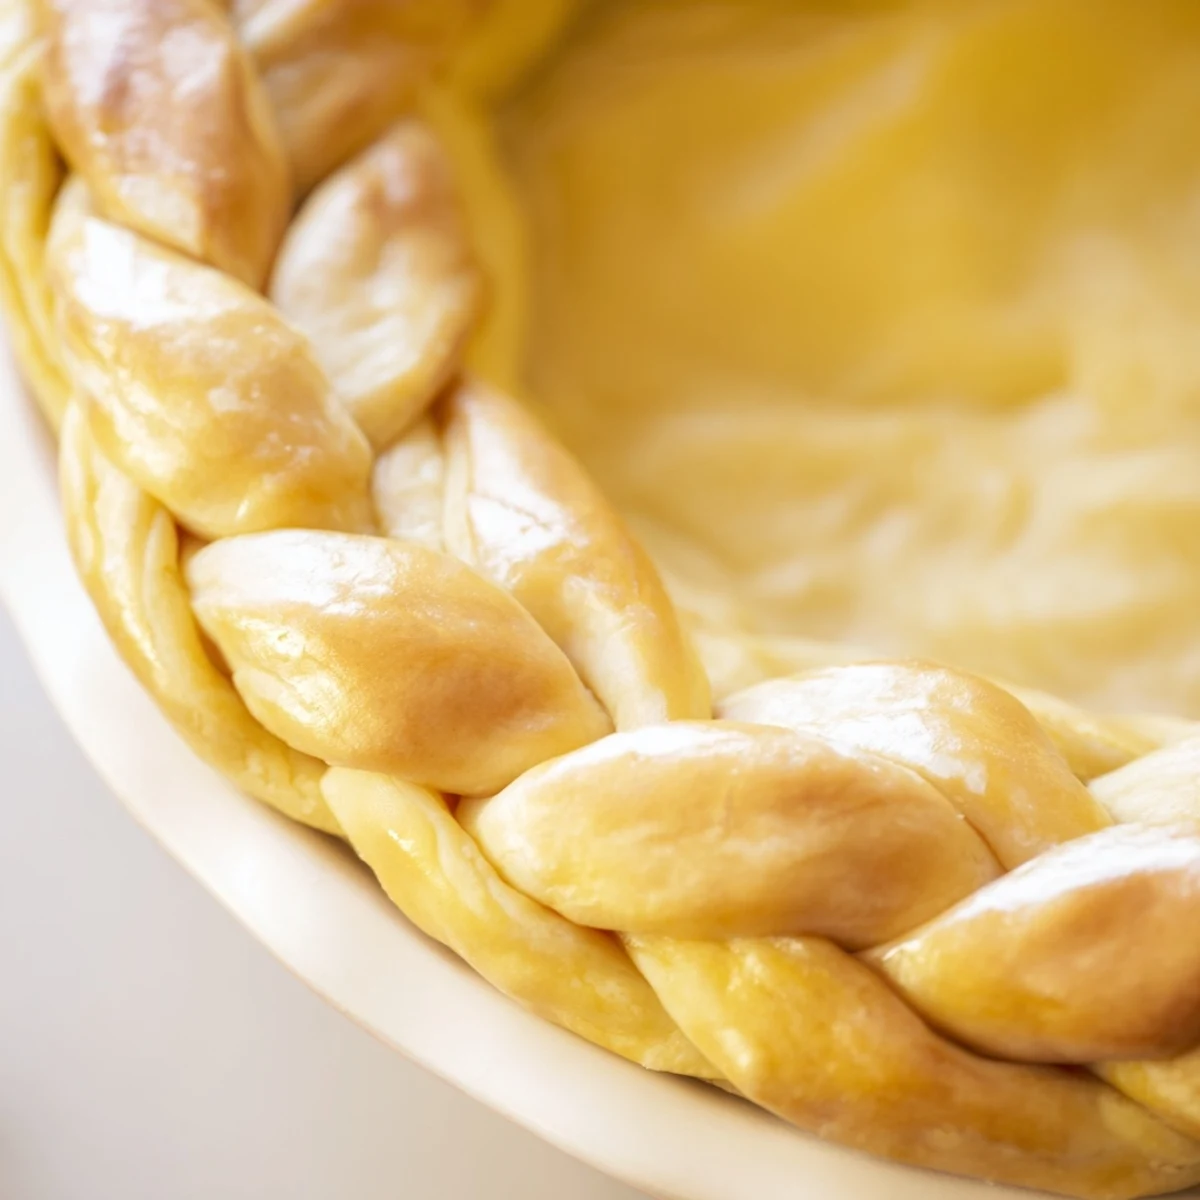
- Master the fishtail braid:
- Group strips into sets of four, pinch the tops together, and working left to right, cross the outermost strip over the next, under the following, then over the last, repeating until fully braided.
- Attach and chill:
- Transfer the braids to your chilled pie edge, pressing gently to adhere and using a bit of water as glue if needed, then chill everything for fifteen minutes to firm up.
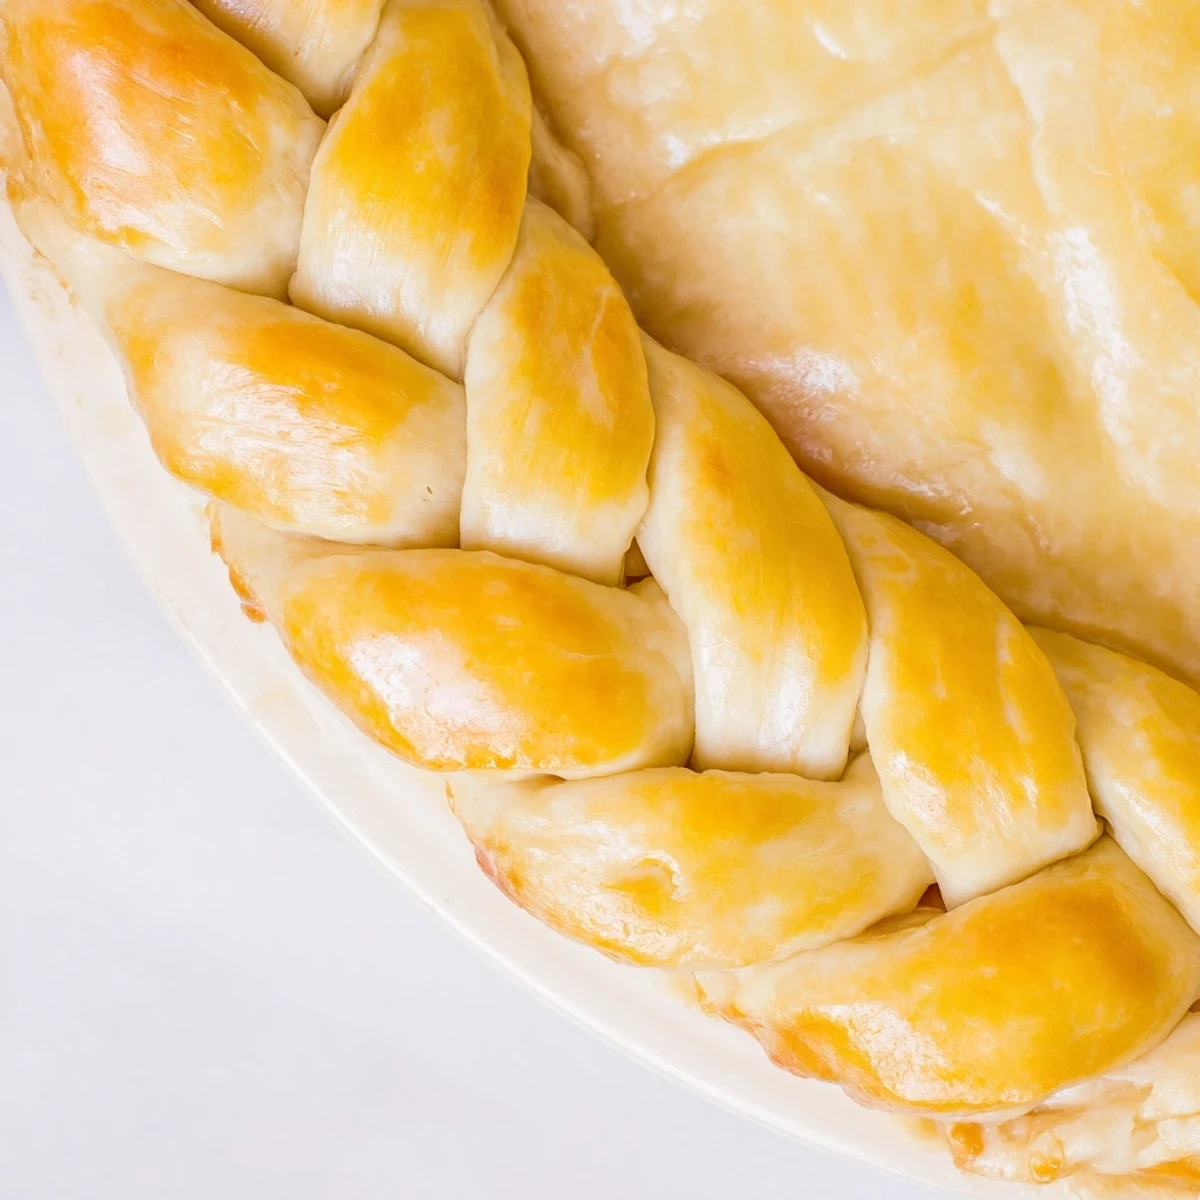
- Egg wash and bake:
- Brush the braids with beaten egg mixed with milk, then bake at four hundred degrees Fahrenheit for twelve to fifteen minutes until golden and beautifully crisp.
 Pin It
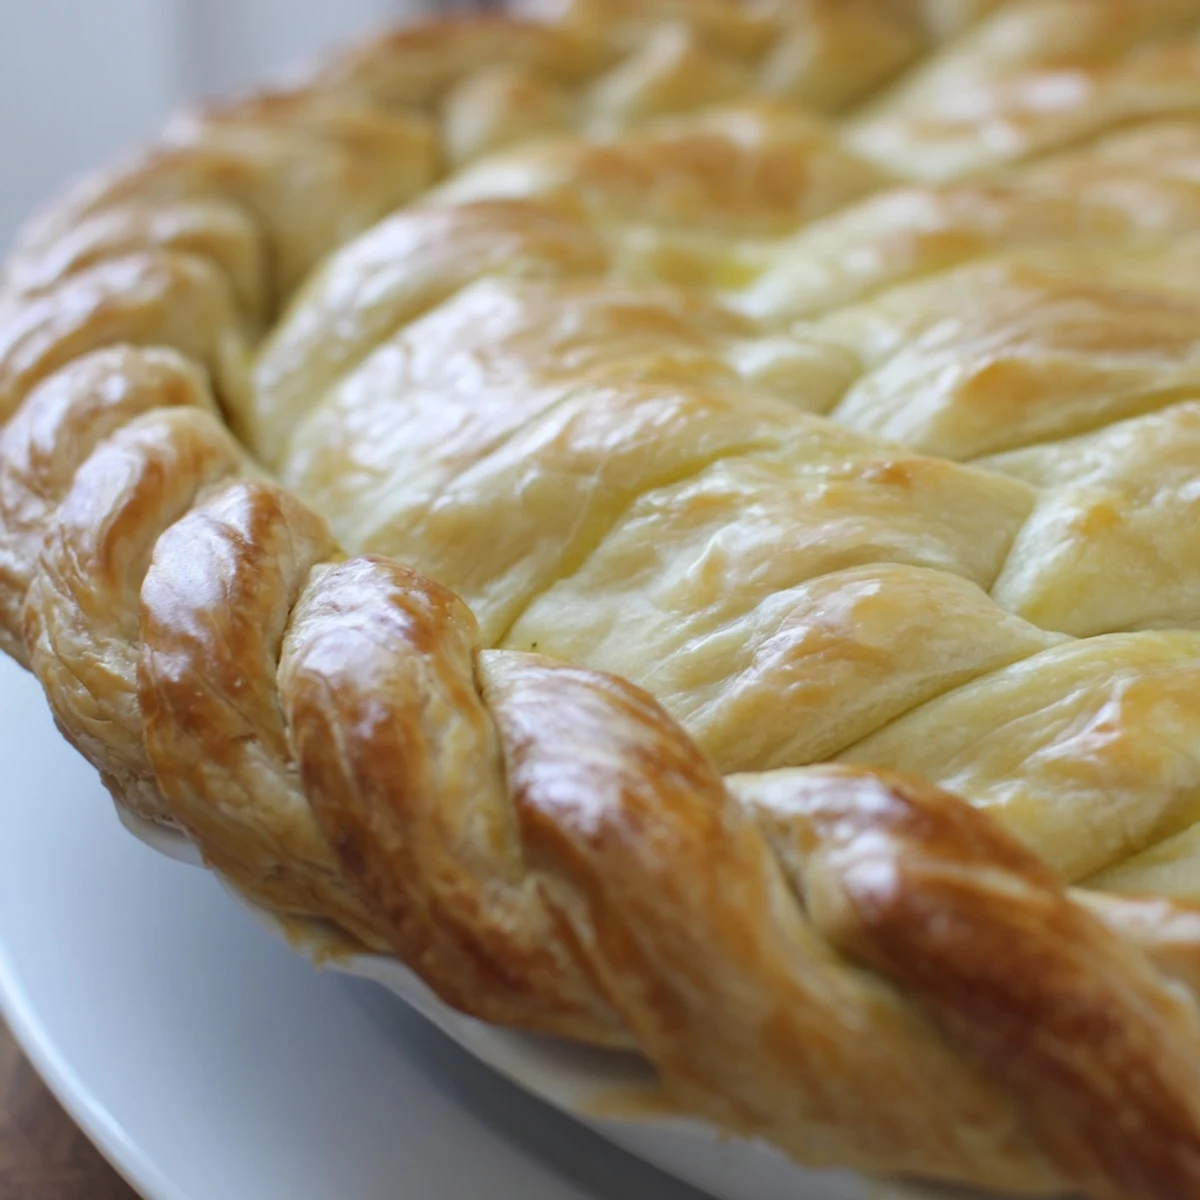
 There is something deeply satisfying about the moment you place that beautifully braided pie on the table and watch everyone lean in closer, trying to figure out how you managed something so intricate. My grandmother, who spent decades making perfect pies the traditional way, actually demanded I teach her the technique last Thanksgiving, and now she texts me photos of her own braided creations with pride emojis.
Making Dough Ahead
The dough can be made up to three days in advance and stored in the refrigerator, or frozen for up to three months if you want to always have pie crust ready for unexpected baking inspiration. I like to make a double batch on Sundays, keeping one disc for the week and freezing the other for those moments when you just need to bake something beautiful.
Savory Versus Sweet
This stunning crust works equally well for savory pot pies and quiches as it does for fruit pies and custards, though I sometimes reduce the sugar to a teaspoon when making something savory. The visual impact remains just as impressive regardless of what is inside, which has made this my go to technique for dinner parties where I want to serve something memorable.
Troubleshooting Your Braids
If your strips are stretching too much while you work, they might be too warm, so return them to the refrigerator for ten minutes before continuing. Uneven strips can make the braiding process frustrating, so take your time cutting them to the same width. Some braids will look tighter than others, and that is completely normal and part of the handmade charm.
- Keep a small bowl of water nearby to help seal the braid ends to the crust if they are not sticking
- If a strip breaks, simply overlap the ends and press together because the egg wash will hide any imperfections
- Practice the braiding motion with four pieces of yarn first if you want to understand the pattern before working with dough
 Pin It
 Every time I pull a braided crust pie from the oven, I remember that messy first attempt and smile at how far I have come. This recipe has taught me that patience and practice really do pay off, and that some of the most rewarding kitchen skills start with a little chaos.
Recipe FAQs
- → What makes fishtail braiding different from regular braiding?
-
Fishtail braiding uses four strands woven in an alternating over-under pattern, creating a distinctive flat, wide design that resembles a fish's tail. Unlike traditional three-strand braids, this technique produces a more intricate, lace-like appearance that's perfect for decorative pastry edges.
- → Can I make the dough ahead of time?
-
Absolutely. Prepare the dough, form it into discs, wrap tightly, and refrigerate for up to 3 days or freeze for up to 3 months. Thaw frozen dough overnight in the refrigerator before rolling and braiding. The dough actually benefits from resting, which helps develop tenderness.
- → Do I need to blind bake this crust?
-
Blind baking is recommended for custard-based pies, fresh fruit fillings, or any pie with a very wet filling. Pre-baking ensures the bottom crust cooks through completely before adding moist fillings. For double-crust fruit pies or fillings that bake longer than 30 minutes, you can skip blind baking.
- → What fillings work best with this decorative crust?
-
This versatile crust complements both sweet and savory fillings beautifully. Try it with apple, cherry, or peach pies for desserts, or use it for quiches, chicken pot pies, and vegetable tarts. The elegant presentation elevates even simple fillings, making it perfect for holidays and special occasions.
- → How do I prevent the braids from unraveling during baking?
-
Pinch the braid ends tightly together before attaching to the crust edge. Use a small amount of water or beaten egg as adhesive to seal braids firmly to the base crust. Chilling the assembled pie for 15 minutes before baking firms the butter and helps maintain the intricate shape during oven time.
- → Can I make this gluten-free?
-
Yes, substitute the all-purpose flour with a high-quality gluten-free flour blend designed for baking. Look for blends that include xanthan gum, which helps replicate gluten's binding properties. The braiding technique works the same way, though the dough texture may feel slightly different when handling.